Want to refresh old tile without breaking a single piece or blowing your budget? Grout paint offers a clever fix. It can bring dull kitchen backsplashes, bathroom floors, and wall tiles back to life by transforming grimy grout lines into sharp, colorful highlights that feel brand new. Many have seen grout paint work wonders, with results that last and impress, making tired spaces pop like they just came from a fancy store. Keep reading to discover how this simple trick could change your space without a big hassle.
This complete guide covers every stage of painting your grout, from deciding if it’s the right move for your space, to choosing the right products, prepping like a pro, and applying the paint itself. No fancy construction background needed—just practical steps, real-world advice, and a focus on results that actually last. Ready to transform the look of your tile? Let’s get started.
Grout Painting Basics to Help You Get Started the Right Way
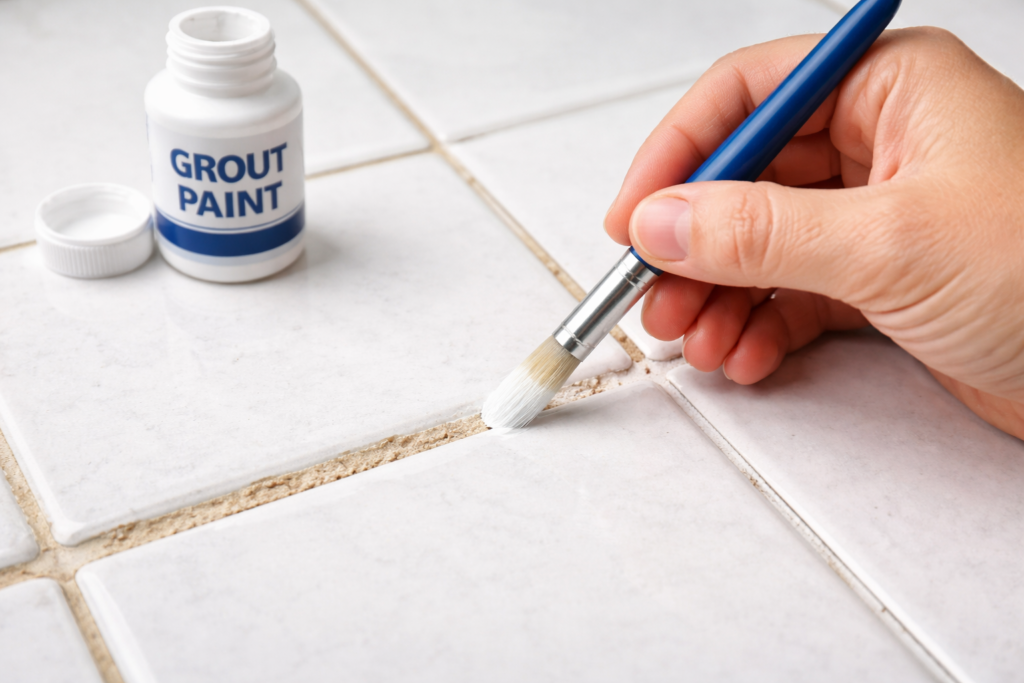
Before you dive straight into cracking open a bottle of grout paint, it’s worth understanding what’s in store. Painting grout isn’t just about slapping color in the lines and calling it a day. Success relies on careful prep, the right tools, and knowing how to avoid missteps that could leave your tile looking worse than before you started.
Grout painting shines in spaces where the tiles are still solid but the grout has started to stain, fade, or look tired. Instead of living with dingy, yellowed lines (or paying for brand-new tiles), you can refresh the whole room’s look in a weekend and without breaking your budget.
But a great end result doesn’t happen by accident. You’ll need to gather specific supplies, spend some time cleaning and taping, and follow a few tried-and-true techniques to make the paint stick—literally and visually. And yes, you can use grout paint on both floors and walls, but there are a few twists for each that you’ll want to know.
Understanding the basics is about more than just doing a good job. It’s about setting the right expectations—how long it will take, what level of effort is needed, and how to make that fresh look last longer than just a couple of showers or mops. Up next, we’ll break down exactly what tools you’ll want to have on hand, and how to prep your grout for a finish that turns heads.
Must-Have Grout Painting Tools for a Flawless Finish
- Precision Brushes or Grout Pens: These let you target grout lines without splashing paint onto the tile itself. Grout pens are mess-free and great for tight spaces, while small angled brushes give you more control for broader lines or natural stone.
- Painters’ Tape: Tape keeps paint neatly in the lines and off your tiles. It’s especially useful around the edges and for protecting decorative tiles or glossy finishes that might stain.
- Clean Cloths or Rags: These are crucial for wiping away excess paint—don’t wait until it dries. Microfiber works best, pulling paint off tile surfaces without leaving lint.
- Bucket and Sponge: Useful for both the cleaning and paint-removal process, especially on bigger floors or if you’re working with old, gritty grout.
- Gloves and Protective Gear: Keeps hands safe from chemicals in the paint and cleaners, plus makes cleanup fast.
Steps to Prep Before Painting Grout Lines
- Thoroughly Clean Grout Lines: Scrub grout using a strong cleaner or a mix of vinegar and baking soda to remove dirt, oils, soap scum, and mildew. Paint won’t stick to anything but clean grout—skip this step, and you’re asking for peeling.
- Inspect for Damage: Check for cracks, holes, or crumbling grout. Patch and repair these spots first, since paint can’t fix structural issues.
- Dry Completely: Make sure your grout is bone dry—at least 24 hours after washing—to prevent moisture trapping under the paint.
- Tape Off Tiles (If Needed): For decorative or natural stone, run painter’s tape along tile edges to keep paint where it belongs.
- Address Mold or Mildew: If you spot any mildew, treat it with a mildew remover and let the area dry fully; leaving it unchecked will ruin paint longevity.
Grout Colorant and Grout Paint Product Reviews That Stand Out
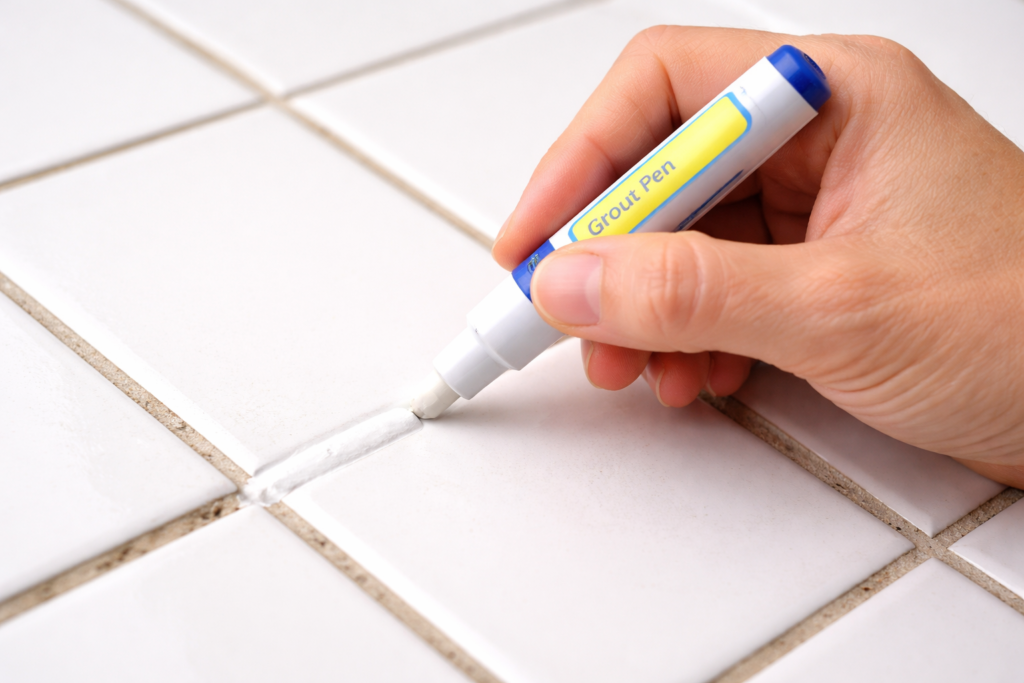
When it comes to grout paint, not all products are created equal. Choosing the right colorant can make or break your tile makeover, especially in rooms that see a lot of foot traffic or constant splashes—think kitchens, entryways, or that well-loved bathroom floor.
In this section, you’ll get a clear-eyed look at the most popular grout colorants and paints on the market right now. From easy-to-apply pens for quick touch-ups to full-coverage paints that last through the daily grind, there’s a product that suits every need and skill level. Ease of use, color variety, and—probably most important—how well the results stand up to real life all get the spotlight here.
Real-world testing shines a light on durability and value, letting you see which products give the most bang for your buck. If you want one less thing to worry about, these reviews will point you to tried-and-true grout paints that really hold up in the messiest, busiest parts of your home. Next, we’ll zero in on a leading product that consistently earns rave reviews, especially for high-traffic, high-moisture spots.
Top Product Recommendation: Custom Building Products Polyblend Grout Paint
Custom Building Products Polyblend Grout Renew is widely considered a top choice for anyone looking to refresh grout lines. This water-based grout paint works as both a colorant and a sealer, delivering a uniform finish that hides stains, yellowing, and past cleaning blunders.
Polyblend shines in kitchens and bathrooms where old grout needs a serious update. It’s easy to apply, dries to a durable finish, and comes in a wide range of colors to match both bold and classic designs. Compared to cheaper alternatives, Polyblend offers reliable longevity and resists peeling or fading, making it a clear pick for anyone aiming for lasting results.
Expert Grout Paint Application Guide for Professional Results

Now that you’re equipped with the right supplies and have picked the perfect colorant, it’s time to put it all together. Applying grout paint is simple on paper, but the secret to a truly professional finish is all in the small details—the way you brush, clean up, and let the paint cure.
This application guide smooths out any nerves by breaking down the process step-by-step. You’ll find tips for avoiding drippy smudges on tile, applying an even coat that won’t crack or chip, and ensuring your grout lines stay sharp, not streaky. Whether you’re a first-timer or have dabbled in DIY before, these steps help you avoid those “well, it looked good for a day” regrets.
We’ll also cover the little tweaks you’ll need when painting grout on a floor versus a wall. These small differences have a big impact on durability—and, let’s be honest, your knees and back. If you stick with these best practices, you’ll end up with a finish that looks straight out of a designer magazine (minus the price tag). Ready for that before-and-after wow factor? The next section tackles tile floors and walls, so your whole space comes out looking new.
Painting Grout on Tile Floors and Walls for a True Tile Floor Transformation
- Start with Walls First: When updating both floors and walls, tackle vertical surfaces first to avoid dust or drips from falling onto freshly painted floors below.
- Use a Steady Hand on Walls: Grout paint on walls requires a more controlled application; use a grout pen or slim brush and wipe stray marks immediately before they dry.
- Go Section by Section on Floors: Since floors collect more dust and hair, work in small zones. Paint the grout, let it set a few minutes, and wipe excess paint off the surrounding tiles with a damp cloth.
- Let It Cure: Allow each coat to dry fully before walking on floors or reinstalling bath mats. Check for touch-ups after 24 hours to ensure even coverage.
- Protect High-Traffic Zones: In busy entryways or bathrooms, consider an added sealant after the paint cures to guard against future stains, mopping, or splashing.
Durability and Sealing: Grout Sealing and Permanence Explained

When it comes to grout paint, folks always want to know one thing: how long is this fresh look going to last? The truth is, grout paint can make tired tile pop again—but a lasting transformation isn’t just about color. It’s about protecting that hard work from the daily grind: foot traffic, spills, and good old-fashioned moisture.
Sealing your freshly painted grout is non-negotiable if you’re after durability, especially in places like kitchens and bathrooms. A quality grout sealer acts as a shield, locking out stains and water before they can do any damage. There are easy-to-apply spray and brush-on sealers designed just for this, so it doesn’t take a pro to finish strong.
Now, don’t let anyone fool you—grout paint isn’t permanent in the way stone or tile is. Its lifespan depends on a bunch of factors: how much foot traffic the area gets, how soon water splashes appear and, most of all, the cleaning methods you use. Harsh chemicals and hard scrubbing can wear down that fresh coat well before its time.
Smart routine maintenance is the secret to keeping striking grout color year after year. Gentle cleaners, soft tools, and a good sealer applied every so often (think once a year in busy areas) go a long way. With the right care, a painted and sealed grout job can hold up great—even in busy households, steamy showers, and bustling kitchens.